

Configuration Guide for External Service Incident Zabbix on the Elven Platform
The External Services Center of the Elven Platform is the bridge that connects you to the best tools on the market to monitor, manage, and resolve incidents in a simple and efficient way. In it, you can integrate Zabbix with the Elven Platform, allowing the reception of alerts and events related to incidents directly on the platform. This enables you to monitor and analyze your applications and services from the perspective of Incident Management, using the best practices and methodologies available, all in one place.
API Token
To integrate the Elven Platform with Zabbix, you need to create an API Token. This unique key is essential for the two platforms to connect securely, ensuring reliable and authenticated information exchange. Simply access the Organization Settings of the Elven Platform, navigate to the API section, and generate it.
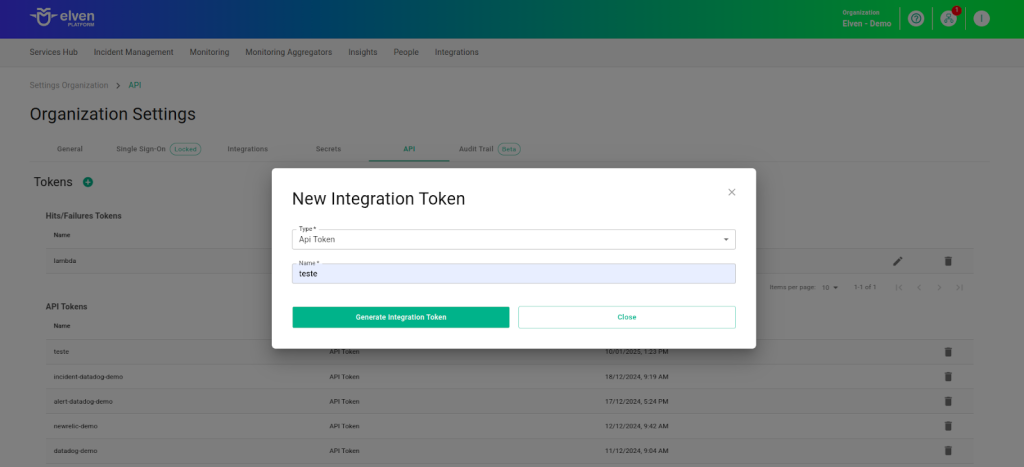
Creating an API Token
In the top menu, under your user settings, click on Organization Settings.
In the API tab, click the + button to create a new API Token.
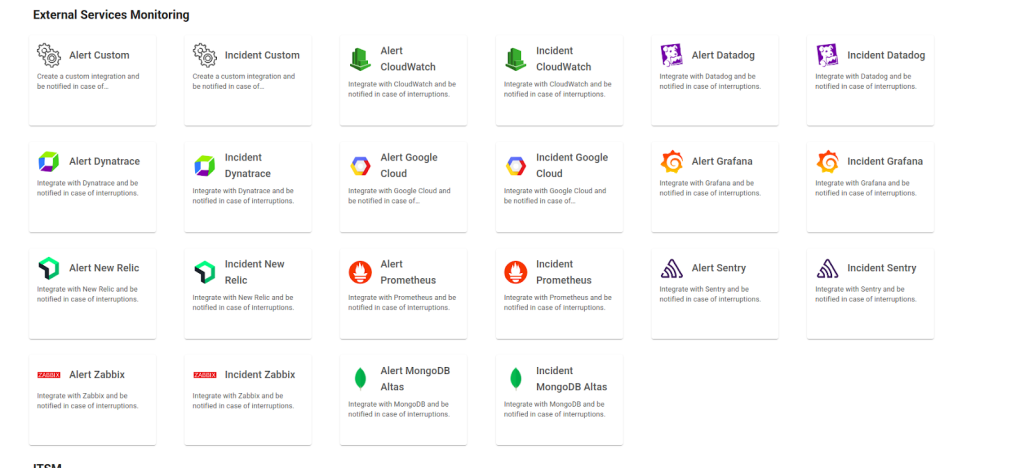
Accessing External Service Incident Zabbix
Navigate to the main menu and click on Services Hub.
In External Services Monitoring, select the Incident Zabbix item.
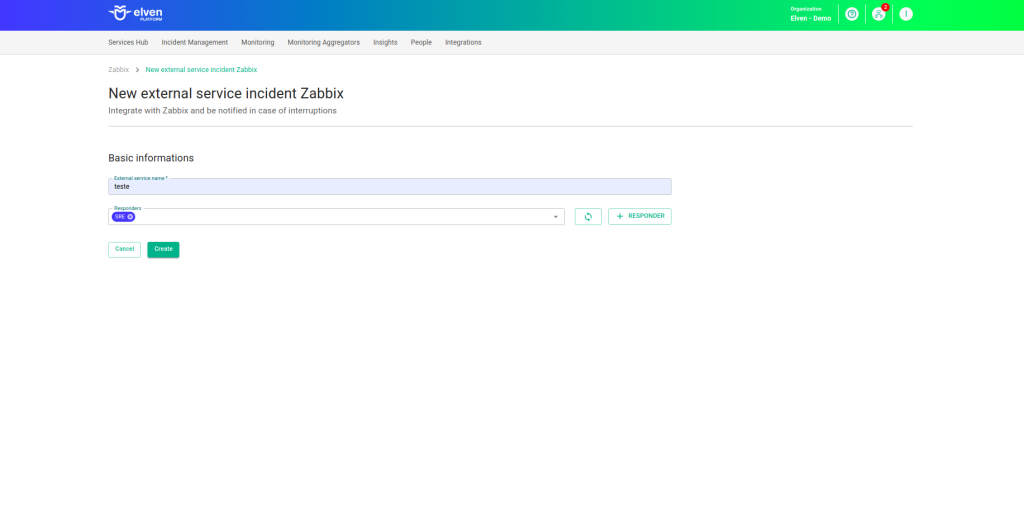
Creating the External Services for Incident Zabbix
In the form, start by filling in the External Service Name field, which will be the name of the external service, and define the Responders, that is, the people or teams who will receive notifications related to this service. After that, click CREATE to proceed. This action will create the initial record of your external service.
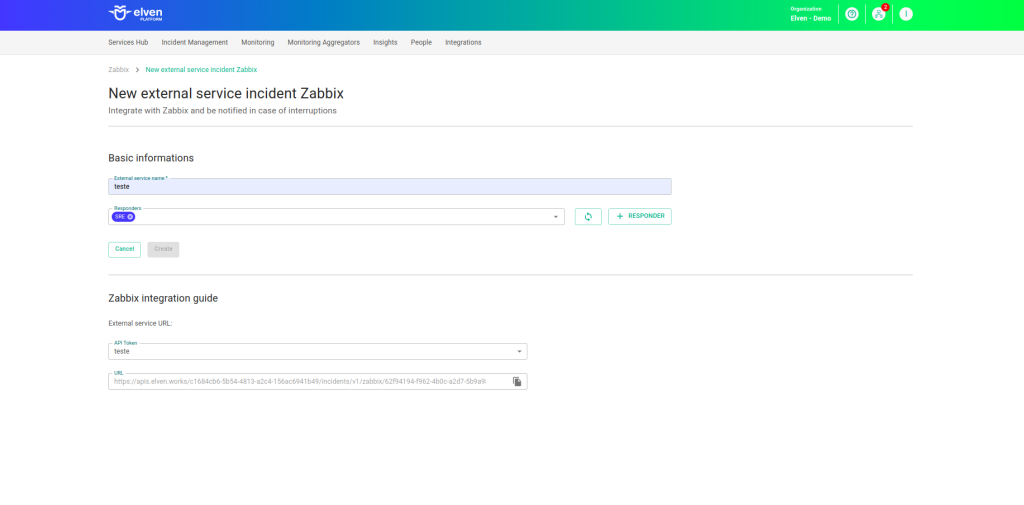
Next, locate the API Token you generated earlier and select it to configure the integration with Zabbix.
Configuring Webhooks in Zabbix
The integration between Zabbix and the Elven Platform was designed to simplify your incident management, centralizing alerts in one place. By connecting these tools, you ensure a more efficient and agile operation, with accurate information always at hand.
Configuring the Media Type in Zabbix
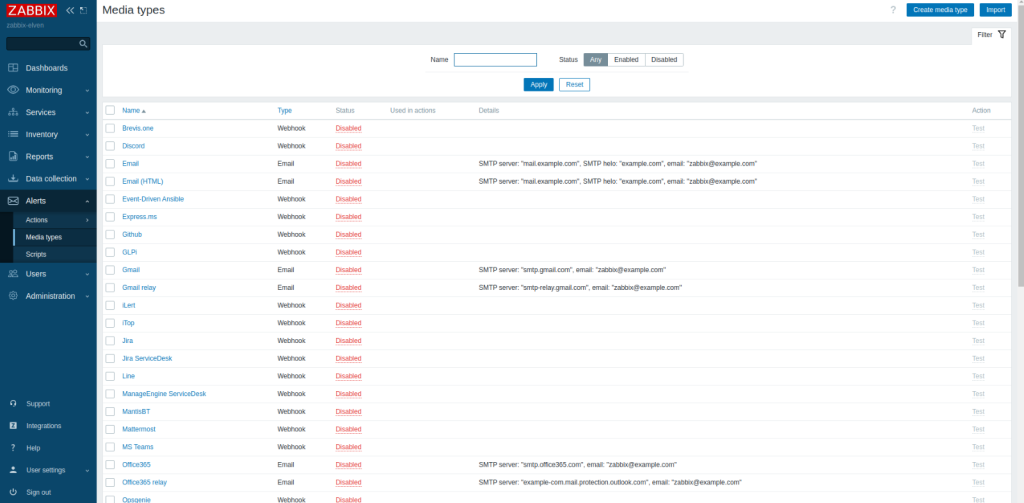
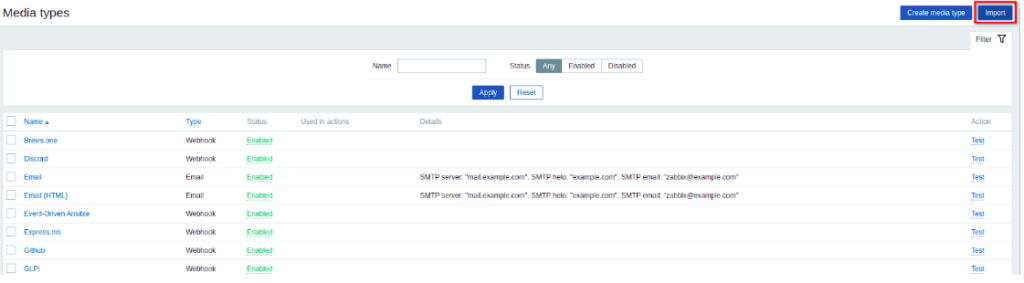
The first step of the integration is to create a communication channel between the platforms. In Zabbix, this channel is called Media Type, and it will be responsible for transmitting alerts to the Elven Platform. To configure it, go to the side menu in Zabbix, click on Alerts, and select Media types. On this screen, locate the Import button in the upper right corner and click it. You will need to import a specific configuration file for your version of Zabbix. To make it easier, you can download it directly from the link below:
During the import, it is essential to check the Create new option, ensuring that the Media Type is added correctly without overwriting any other configuration. Once the import is complete, the Elven Platform will appear in the list of available Media Types. This will be the channel through which Zabbix will send alerts to the Elven Platform.
With all steps completed, your integration is almost ready. When Zabbix detects a problem, an alert will automatically be sent to the Incidents tab of the Elven Platform. Resolve the issue in Zabbix, and the incident will be marked as Resolved on the platform.

Customizing the Media Type
Now that the communication channel is created, we need to customize it so that notifications are properly directed.
To do this, click on One Platform and fill in the following fields:
Organization ID (
elven_platform_organization), which identifies your organization in the Elven Platform.API URL (
elven_platform_url), provided during the initial setup of the integration.
It's important to remember that the Organization ID is present in the body of the URL and is essential for correct configuration. If you have any questions, Elven Platform support can help.
After filling in the information correctly, click Update to save the changes.
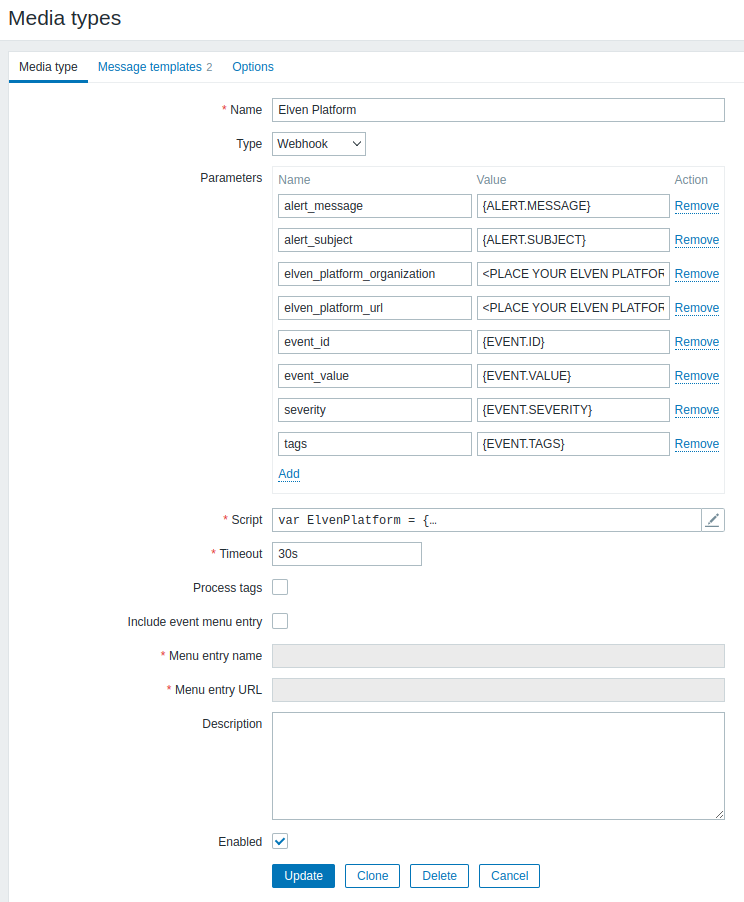
The other parameters define the information sent to the Elven Platform whenever an event occurs. When an event happens in Zabbix, it sends essential data to the Elven Platform. The alert_message details the alert, while the alert_subject summarizes what happened. The event_id facilitates tracking, and the event_value indicates whether the event is Alarmed or Resolved. The severity defines the criticality, and the tags help with organization. These parameters ensure an efficient and customizable integration.
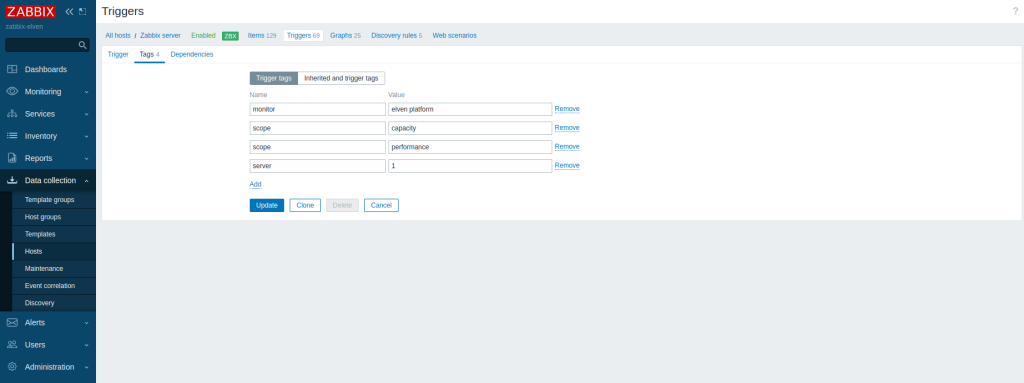
With this in mind, in Zabbix, we can add custom tags to triggers to strategically organize and categorize alerts. Simply go to the Hosts section, navigate to Triggers, and select the Tags tab. This makes alert triage easier, improves integration with the Elven Platform, and enables a faster response to incidents. With this approach, monitoring becomes more efficient and incident management much more agile and organized.
Defining Who Will Receive the Alerts
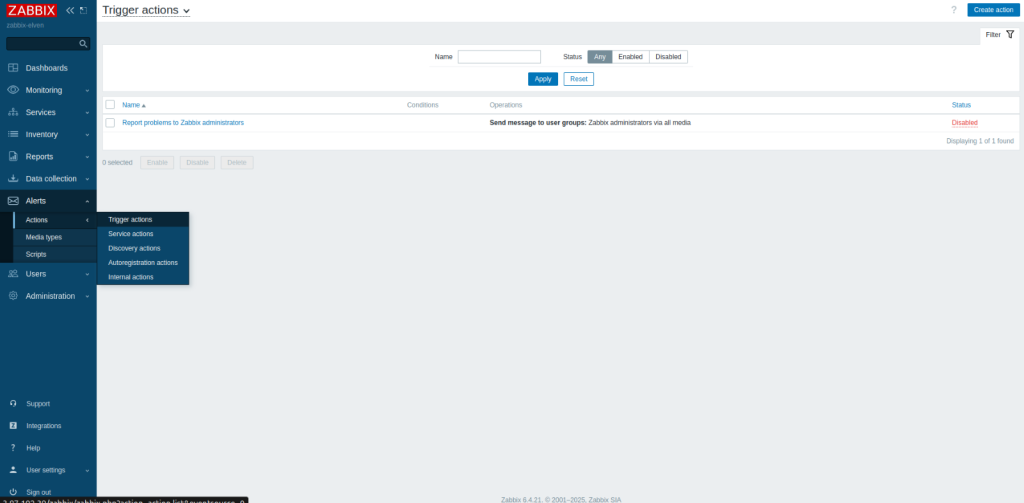
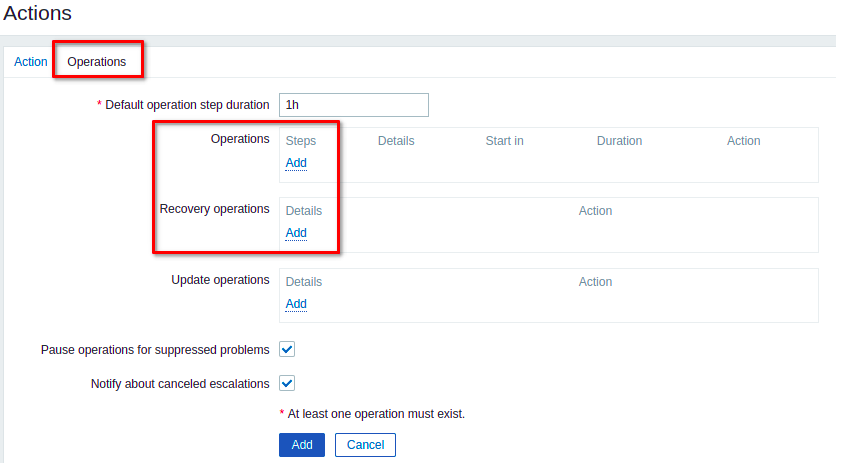
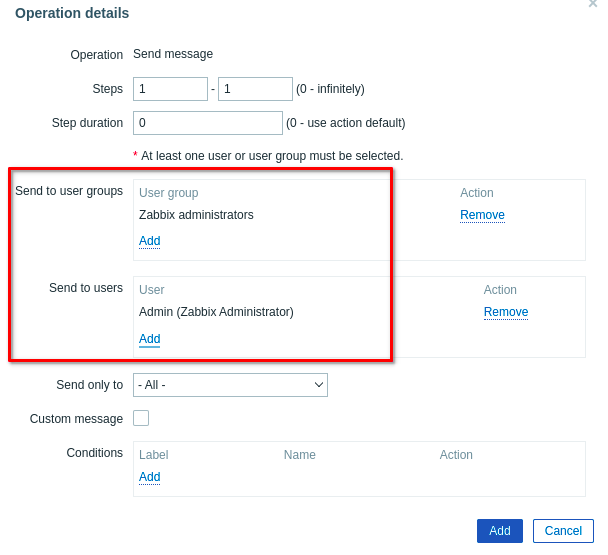
With the communication channel configured, the next step is to determine who will be notified when an alert is generated. In the Zabbix side menu, go to Alerts, click on Actions, and select Trigger Actions. Within this section, click on Create action to create a new notification rule. Choose a descriptive name for this action, such as Critical Service Monitoring, to make identification easier. Then, go to the Operations tab and define the user groups and individual users for both Operations and Recovery operations. These will be the ones to receive the alerts. In our case, we selected the Admin user, but this choice depends on your team's and organization's structure.
Configuring the User to Receive Notifications
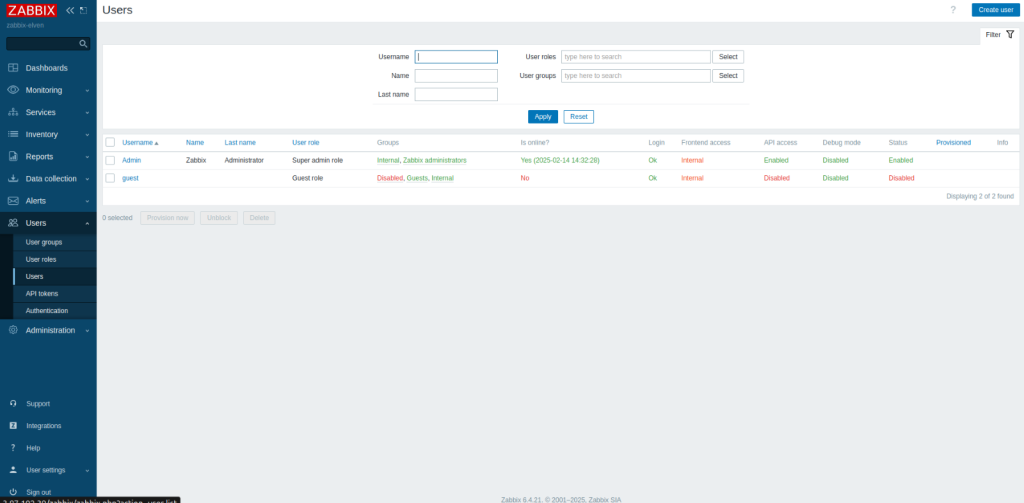
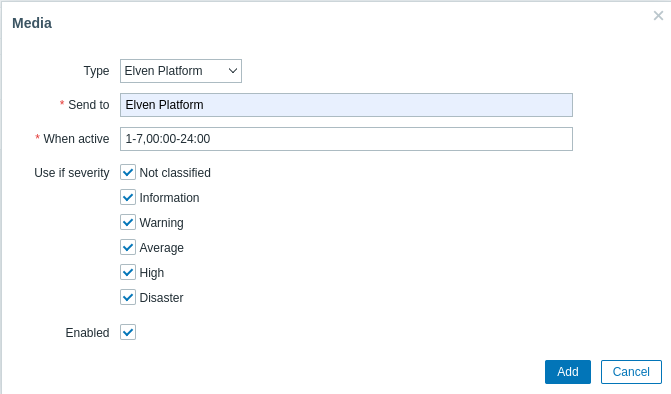
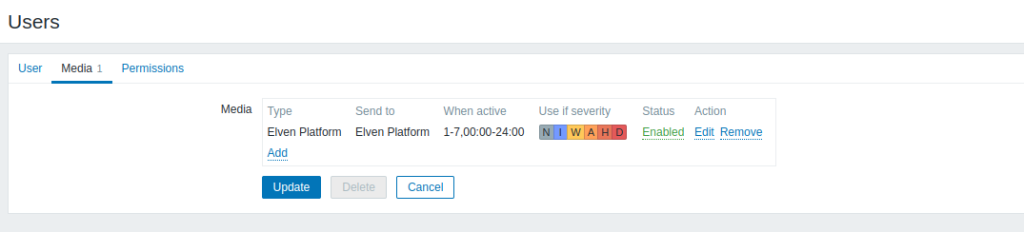
Now that the notification rule has been created, we need to ensure that the user configured in Zabbix receives the alerts correctly. Access the Zabbix side menu, click on Users, and then Users again. From the list of users, select Admin. Next, go to the Media tab and click Add to add a new notification channel. On the configuration screen, choose Elven Platform as the Type, and in the Send to field, enter a reference name, such as Elven Platform. It’s worth noting that, in the case of a Webhook, this reference is for organizational purposes only, since the actual service URL has already been defined in the Media Type. After filling everything out correctly, click Update to save the changes.
Testing and Ensuring Integration Functionality
When the problem is resolved in Zabbix, the Elven Platform will also register this resolution, marking the incident as Resolved. This ensures efficient monitoring, with real-time alerts and faster incident management. If you need support at any stage, the Elven Platform team is available to help. Once configured, the service will appear in the External Services Monitoring Center, categorized by status, making it easier to monitor incidents, with priority given to those in an alarm state.
Additional security and performance settings
IP Whitelist: API communication can be configured to allow only authorized IPs. To enable or modify this setting, contact Elven Platform support.
Rate Limiting: The default time for request limiting is 5 minutes, but it can be adjusted as needed. For changes, contact Elven Platform support.
These settings ensure greater security and control over the data traffic between the integrated systems.
Glossary of Technical Terms
API Token: A unique key that authenticates and authorizes communication between Elven Platform and Zabbix, ensuring secure information exchange. External Services Monitoring: A feature of the Elven Platform that allows integration with external services, such as Zabbix, for centralized monitoring and alert delivery. Organization Settings: Area in the Elven Platform where organization-related settings are managed, including the creation of API tokens. Responders: People or teams designated to receive notifications and act in response to incidents reported by the integration. Media Type: A component in Zabbix used to configure communication channels, allowing alerts to be sent to external destinations such as the Elven Platform. Elven Platform: The specific Media Type in Zabbix configured to integrate and send notifications to the Elven Platform. Organization ID: A unique identifier provided by Elven Platform support to associate the Media Type with the correct organization during integration. API URL: The address provided by the Elven Platform to route alerts sent by Zabbix, connecting it to the appropriate endpoint. Trigger Actions: Actions configured in Zabbix to monitor specific events (such as issues on hosts or services) and send alerts based on those conditions. Conditions: Criteria defined in Zabbix that determine when a Trigger Action will be triggered, such as the occurrence of a problem on a host or host group. Operations: Configuration in Zabbix that defines what should happen when a Trigger Action is triggered, such as sending notifications to users or groups. Recovery Operations: Actions configured to notify about the resolution of problems detected in Zabbix. Triggers: Rules in Zabbix used to detect specific conditions on monitored hosts or services, such as failures or out-of-range values. Severity: Levels assigned to incidents detected by Zabbix, helping categorize and prioritize alerts in the Elven Platform:
Informational: General information or low-impact events.
Low: Low-priority issues that require eventual attention.
Moderate: Medium-impact incidents.
High: Critical issues requiring immediate action.
Critical: High-impact events needing urgent response. Import: A feature in Zabbix that allows importing configurations, such as the Media Type, to facilitate integration with external tools.
Last updated
Was this helpful?