

Integration Guide for Elven Platform ITSM Jira
The integration between Elven Platform and Jira allows you to create tickets directly from the incident screen, offering a fast and integrated solution for incident management. With this feature, it’s possible to sync actions performed in Elven Platform with Jira tickets, ensuring that all information remains centralized and accessible to the involved teams.
When opening a ticket in Jira through Elven Platform, all changes made to the incident, such as updates to status, title, description, or assignments, will be automatically reflected in the corresponding ticket. This real-time synchronization eliminates the need for manual updates, reducing errors and speeding up the workflow.
When an incident is resolved in Elven Platform, the ticket in Jira will also be updated automatically, indicating the issue has been resolved. This ensures an accurate record of the incident lifecycle, making it easier to track and document resolutions.
Accessing the Jira ITSM Integration Settings
In the upper right corner of the screen, click the profile icon. The icon may be represented by an avatar or the initial of your name.
In the menu that appears, select the Organization Settings option. This option will take you to your organization’s settings.
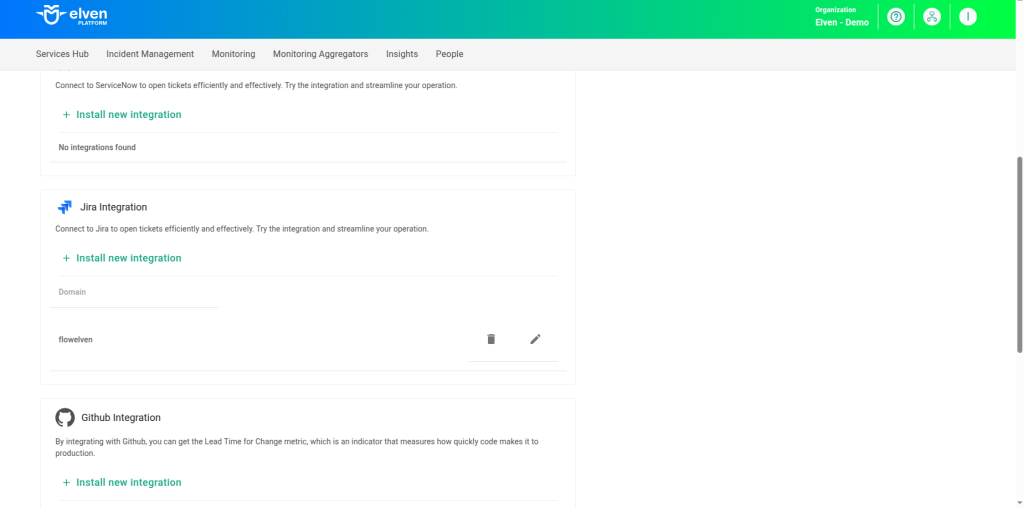
Click the Integrations tab. This is where you can view and manage all available integrations.
Under the Jira Integration option, you can create the integration with Jira. To do this, simply open the configuration form (Install new integration), available within this section.
Implementing Jira ITSM Integration
Connecting Jira to Elven Platform is simpler than it seems, and it was designed to make your team’s routine more efficient and integrated. First, it’s important that you already have a Jira Service Management project created in your Jira environment. This project will be responsible for automatically receiving the tickets generated by Elven Platform. With the project ready, access the integration configuration form and follow these guidelines:
In the Integration name field, choose a name that helps identify this integration easily in the future, something meaningful for your team.
In Default Jira Language, select the default language used in your Jira project to ensure the data is interpreted correctly.
In the Subdomain field, enter only your Jira subdomain (the part that comes before
.atlassian.net). This detail is essential to establish the connection with the correct platform.Finally, in Project Key, type the code of the Jira project where the tickets should be created. You can find this information within your project settings in Jira.
With all fields completed, the integration will be ready to work, allowing incidents from Elven Platform to automatically become tickets in Jira, in a smooth and centralized way.

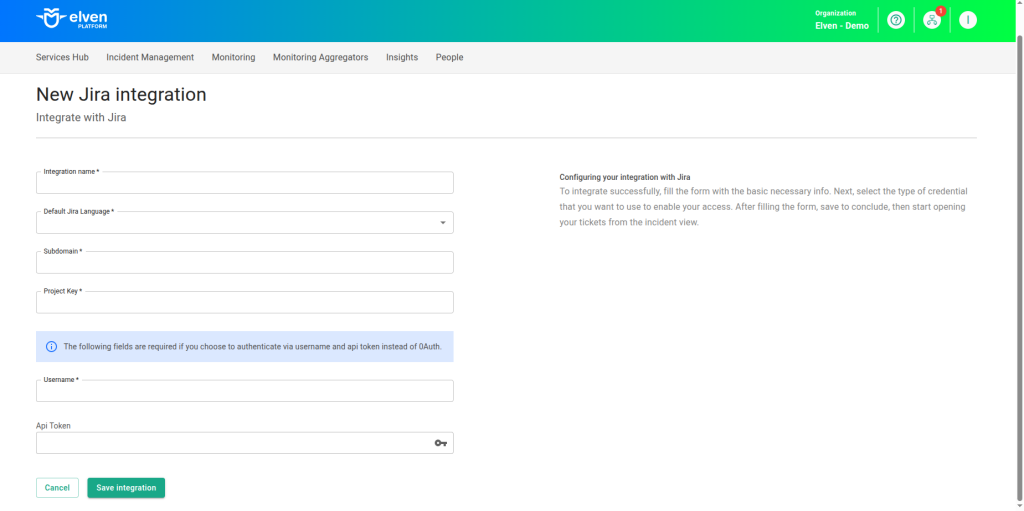
Authentication for the integration between Jira and Elven Platform is done using username and token. To configure it, fill in the Username and Api Token fields, using the token generated on the security page of your Jira account. After completing all required fields, click Save integration to finish the setup. With this, the integration will be ready, allowing you to open tickets directly from the incident screen in Elven Platform and centralize information management efficiently.
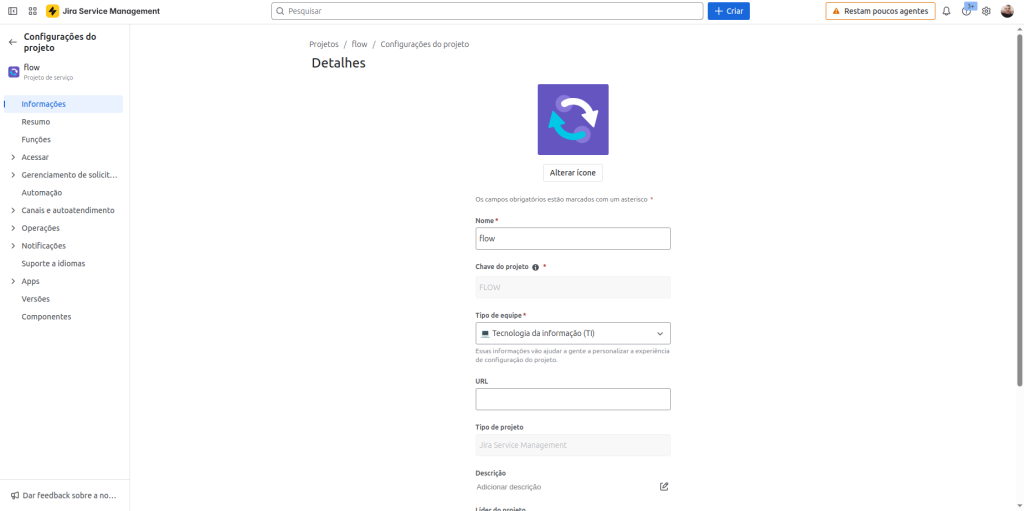
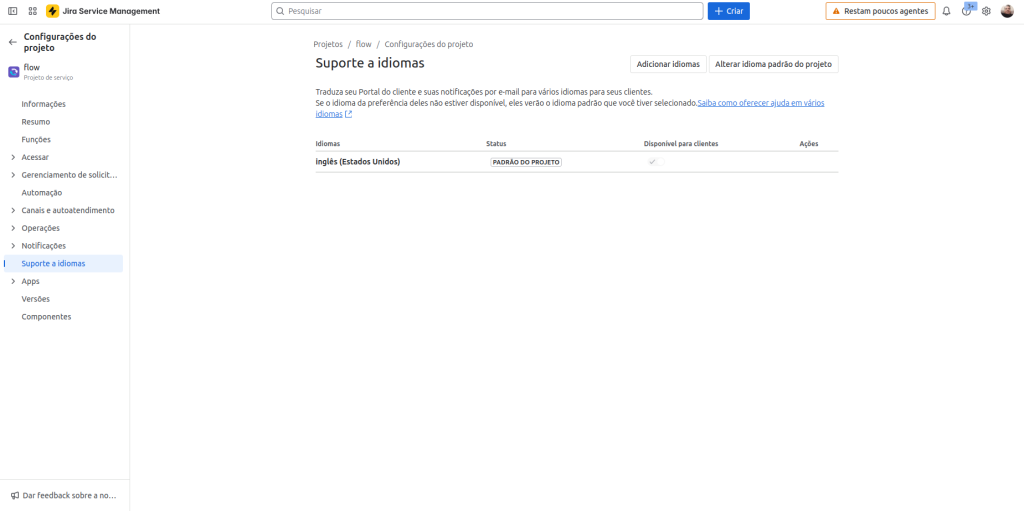
To check the language configured in Jira, locate your project and click the three-dot icon (•••). Then, select the option to access Project Settings. Within this area, look for Language Support, where you’ll see the default language configured. This ensures that the integration with Elven Platform aligns with your language preferences.
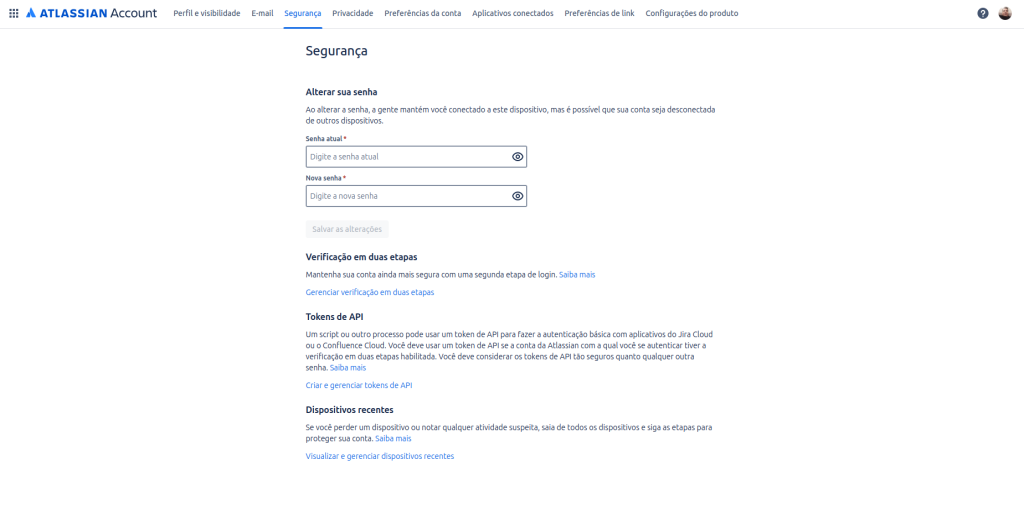
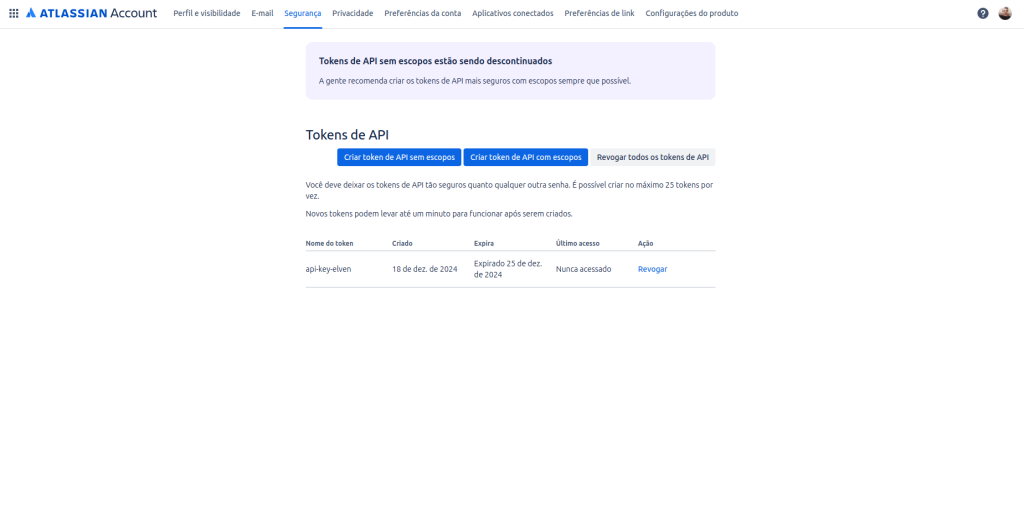
To obtain your API Token easily, click on your avatar (or your initials) and go to the Account Settings option. Then, navigate to the Security tab and click Create and manage API tokens. Next, select the Create an API token button. Give the token a name, something that will help you identify it in the future, and finish by clicking Create. Done! Your token has been successfully generated and is ready to be used in the integration with Elven Platform.
If you prefer, you can ensure greater security by storing the token as a secret. To do this, simply click the key icon in the API Token field when configuring the integration. This way, you protect your credentials and stay focused on efficiency and security in your work environment.
Additionally, after completing the integration process between Elven Platform and Jira, your integration should appear in the list under the Integration Jira option.
Opening a Ticket in Jira
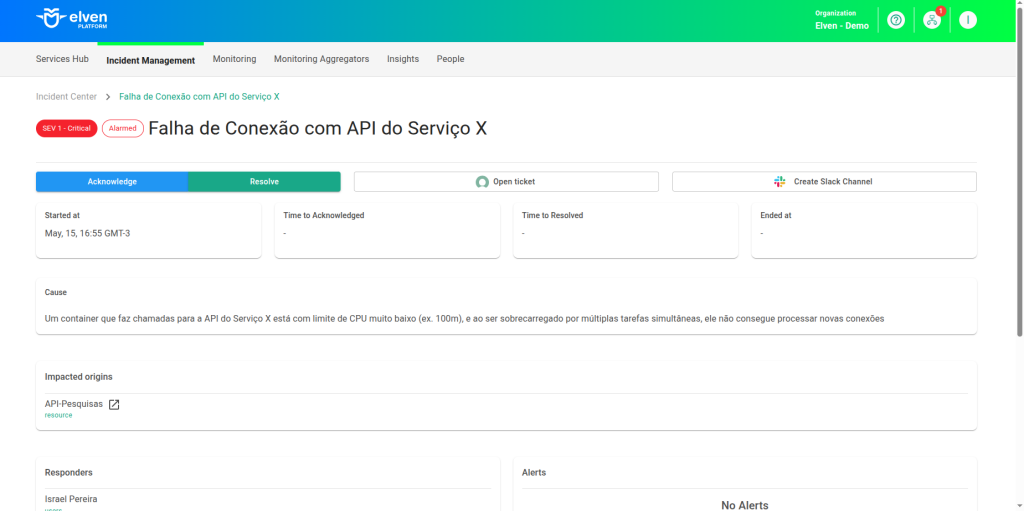
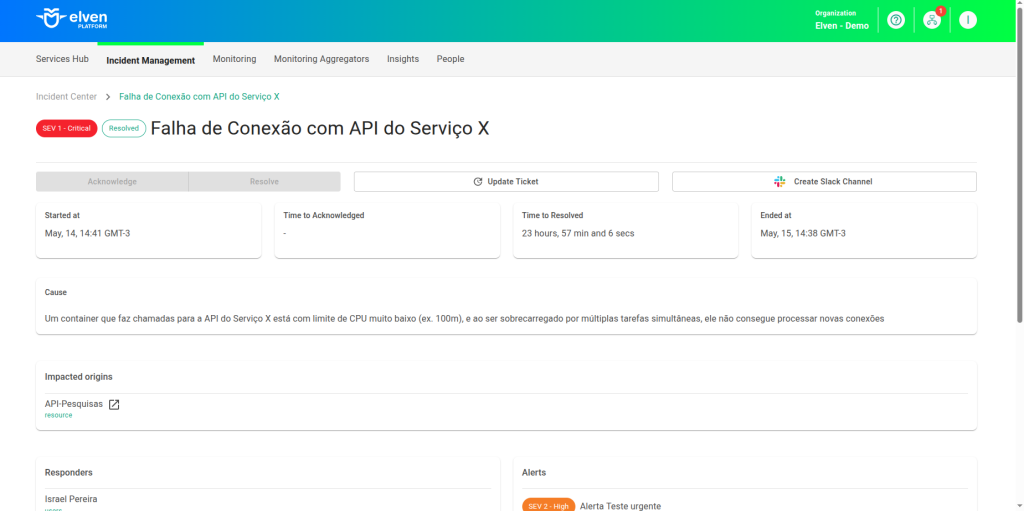
To create a ticket in Jira from Elven Platform, simply locate the desired incident and click the Open Ticket button available on the incident screen. This will open the ticket in Jira, keeping both platforms aligned for efficient management.
Incident Resolution
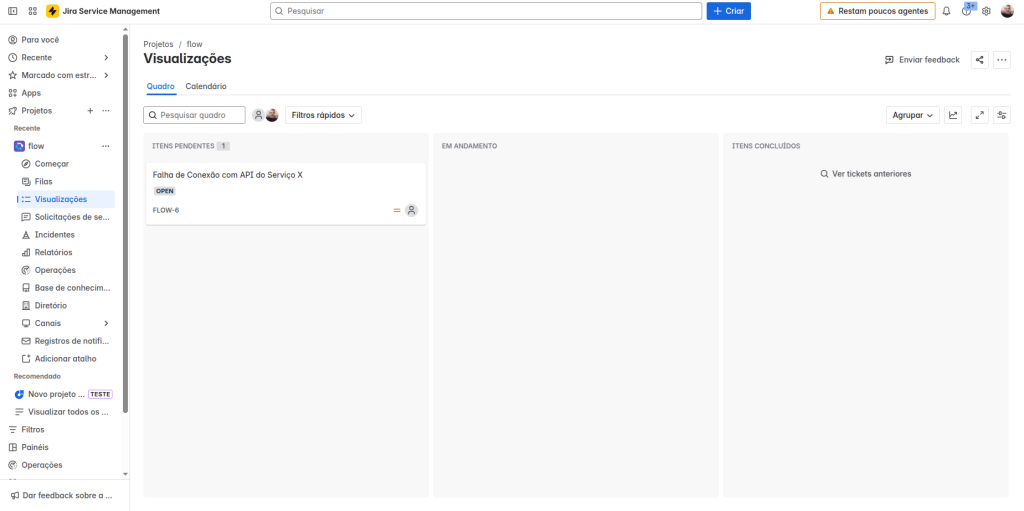
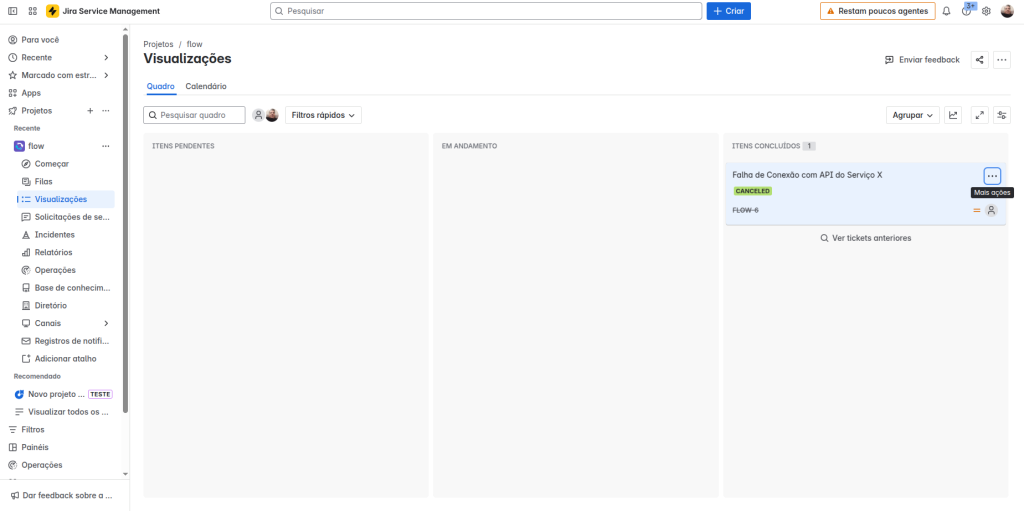
After resolving the incident, you can update the ticket status in Jira directly from Elven Platform. Simply locate the incident and click the Update Ticket button available on the incident screen. This action will synchronize the information and automatically move the ticket to the COMPLETED ITEMS column, ensuring that the workflow is always up to date and aligned between the two platforms.
This feature makes it easier to track the ticket lifecycle, reducing the need for manual adjustments and providing greater efficiency in incident management. This way, your team can focus on solving problems while Elven Platform handles the organization and communication between the integrated systems.
Glossary of Technical Terms
ITSM (IT Service Management): IT service management that organizes and standardizes processes related to incidents, problems, and service requests.
Jira: Widely used project management tool for tracking tasks, bugs, and incidents.
Integration Name: Name of the integration configured in Elven Platform, used to easily identify it in the integrations menu.
Default Jira Language: Default language configured in the Jira instance, which should be specified to align the integration with user preferences.
Subdomain: Part of the URL address of your Jira instance, used to correctly connect Elven Platform to your Jira environment. Example: subdomain.atlassian.net.
Project Key: Unique code of the Jira project, required to associate Elven Platform tickets with the correct project. Example: “PROJ1”.
Username: Username used for authentication in the Jira integration.
API Token: Token generated in the Atlassian account for secure authentication between Elven Platform and Jira.
Security: Tab in the Atlassian account settings where you can create and manage API tokens for authentication.
Open Ticket: Button available on the incident screen in Elven Platform to create a new ticket in Jira from an identified incident.
Update Ticket: Button on the incident screen in Elven Platform that allows updating the status of an already created ticket in Jira, synchronizing the information and moving it to the COMPLETED ITEMS column.
COMPLETED ITEMS: Column in Jira where resolved tickets are automatically moved after the status is updated by Elven Platform.
Secret: Secure storage option for the API Token during the integration configuration, available in Elven Platform.
Last updated
Was this helpful?