

Configuration Guide for SSO with SAML for integration between Microsoft Entra and the Elven Platform
SSO (Single Sign-On) integration with SAML provides users with a simplified and secure login experience, allowing access to multiple applications using a single authentication. Below, we detail the configuration process between the Microsoft Entra Admin Center and the Elven Platform, explaining each step in a clear and intuitive way.
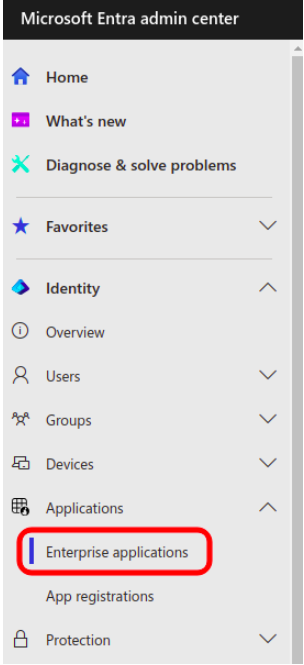
Configuring the application in Microsoft Entra
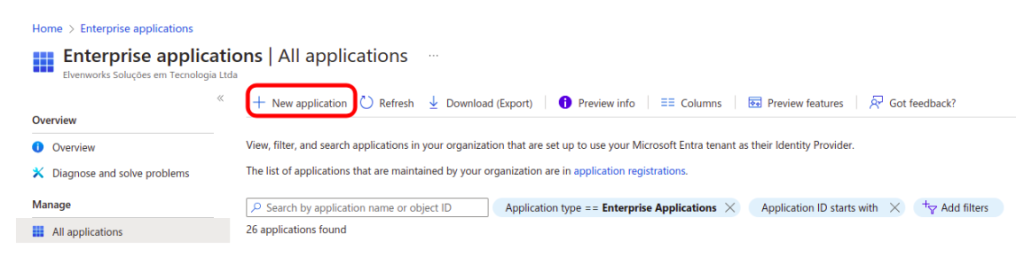
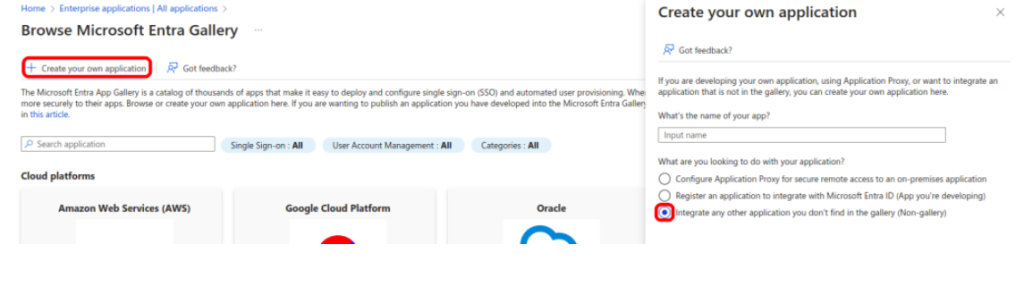
Start by accessing the Microsoft Entra Admin Center dashboard. In the side menu, go to Identity > Applications > Enterprise applications and click New application. Here, you will create a new custom application to integrate with the Elven Platform. Choose the option Create your own application and select “Integrate any other application you don’t find in the gallery (Non-gallery)”. This ensures that you can configure any application not previously listed in the catalog.
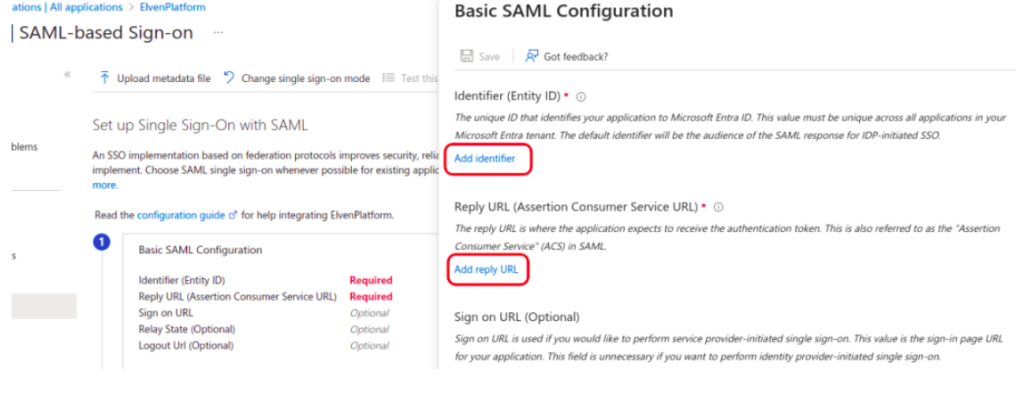
Enabling SAML in the application
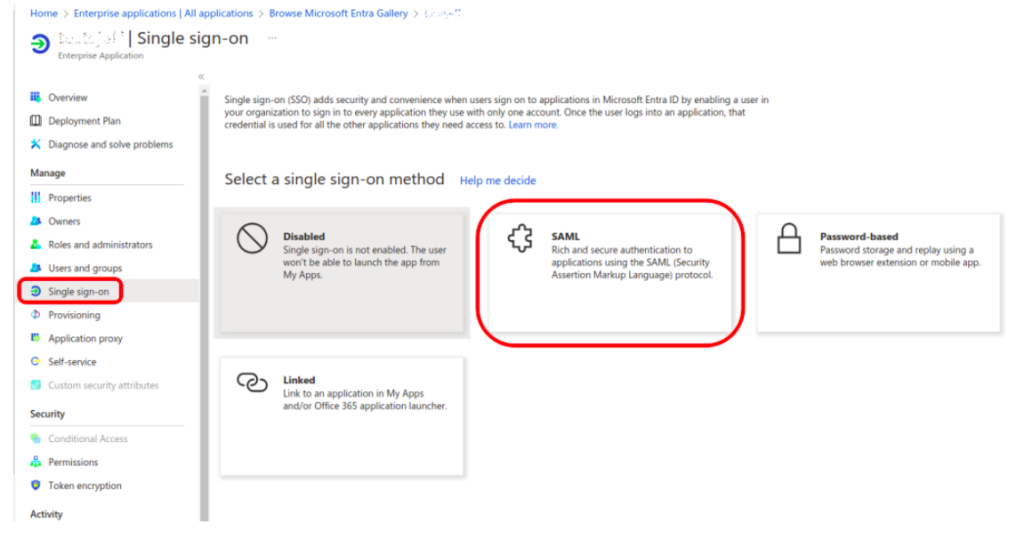
After creating the application, go to its menu and select the Single sign-on tab, choosing the SAML method. In the Basic SAML Configuration field, you will need to fill in specific information from the Elven Platform. These settings are essential to establish communication between the systems.
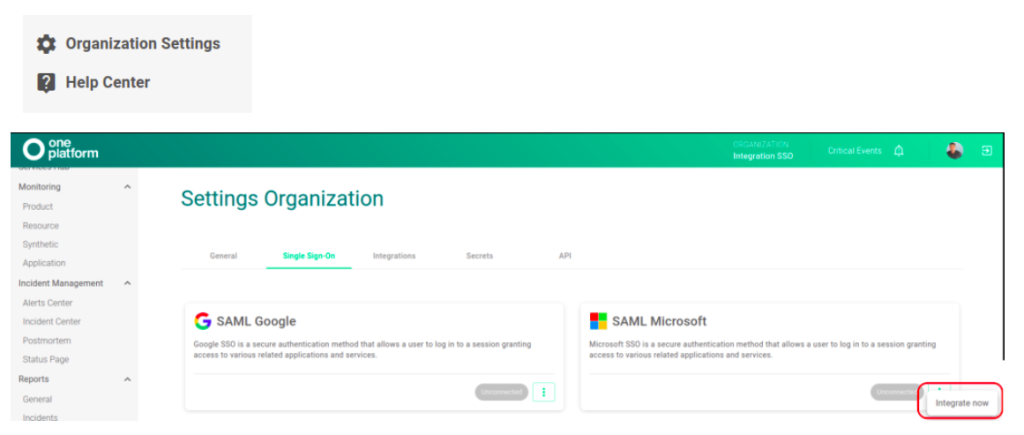
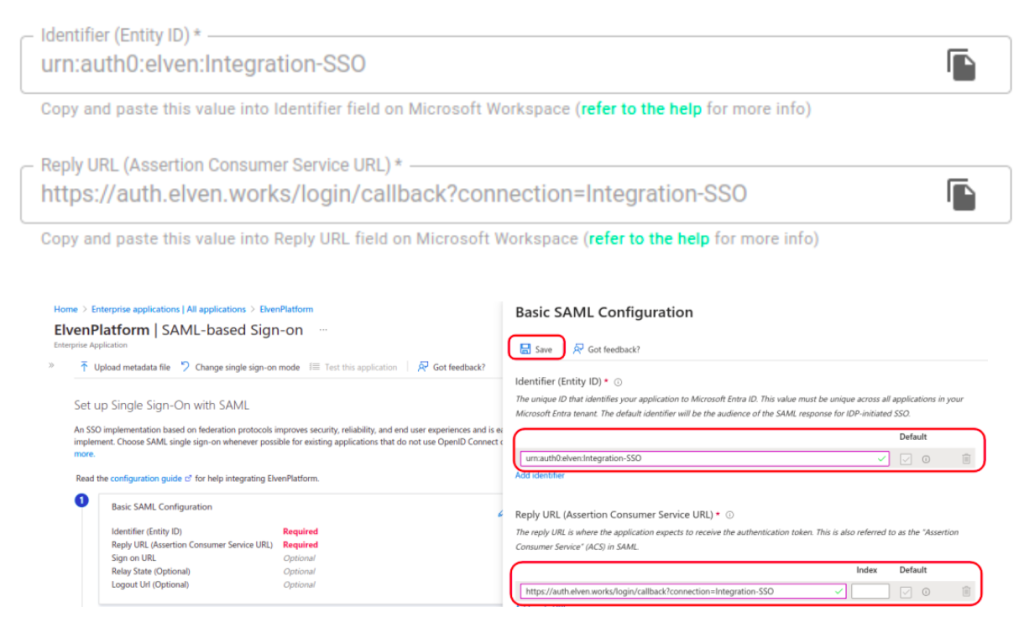
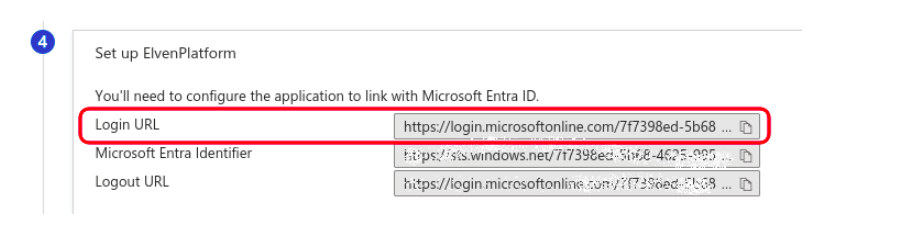
Retrieving data from the Elven Platform
In the Elven Platform, go to Organization Settings in the lower-left corner. Click the three dots next to SAML Microsoft and select Integrate now. A form will appear with the information you’ll need to copy in order to fill out the Basic SAML Configuration in Microsoft Entra. This data exchange creates the bridge between the two platforms.
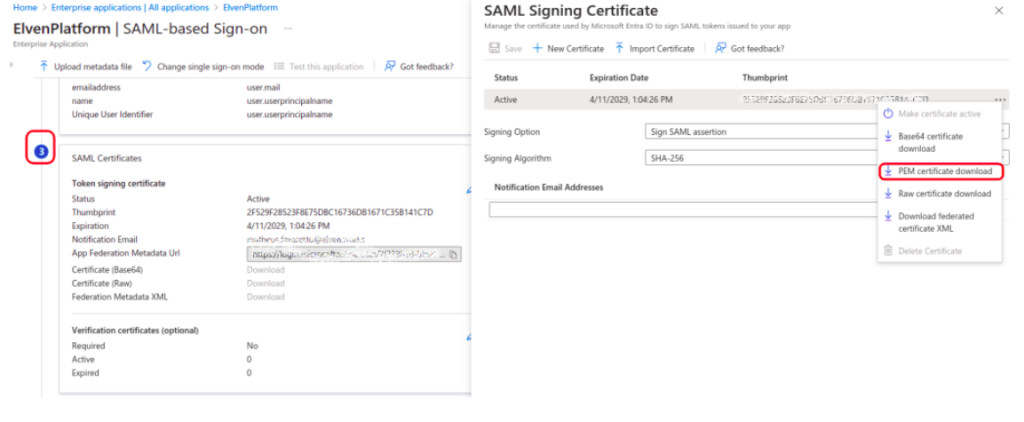
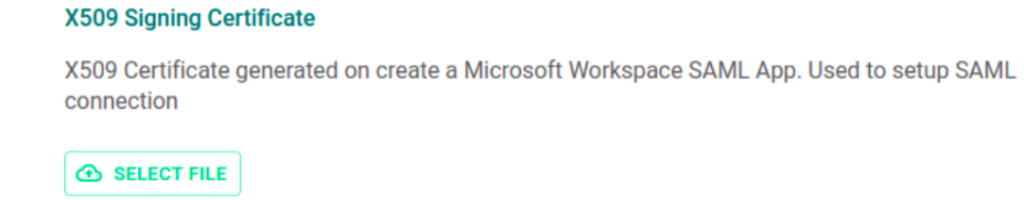
Configuring the certificate
To ensure secure communication, you’ll need to configure a certificate. In Microsoft Entra, go to step 3 of the SAML configuration and click “edit”. Then, click the three dots and select PEM certificate download. After downloading the certificate, return to the Elven Platform and upload it by clicking SELECT FILE. This step authenticates the connection, ensuring that only trusted sources can interact.
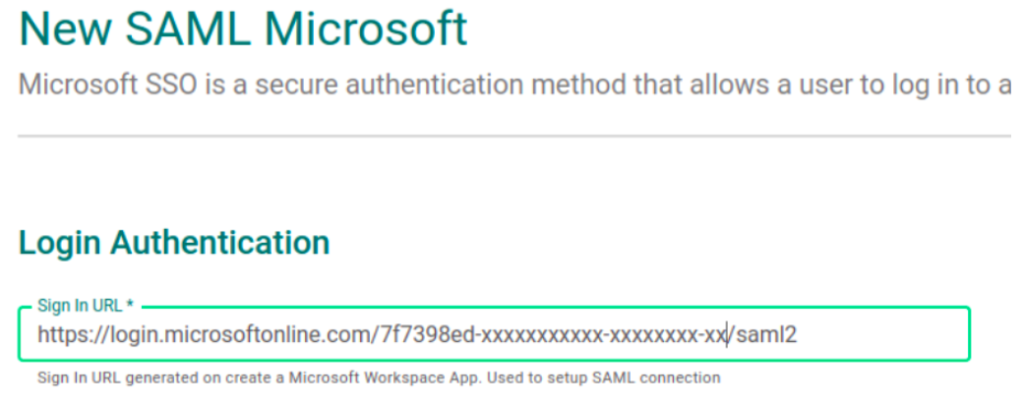
Adjusting URLs and adding users
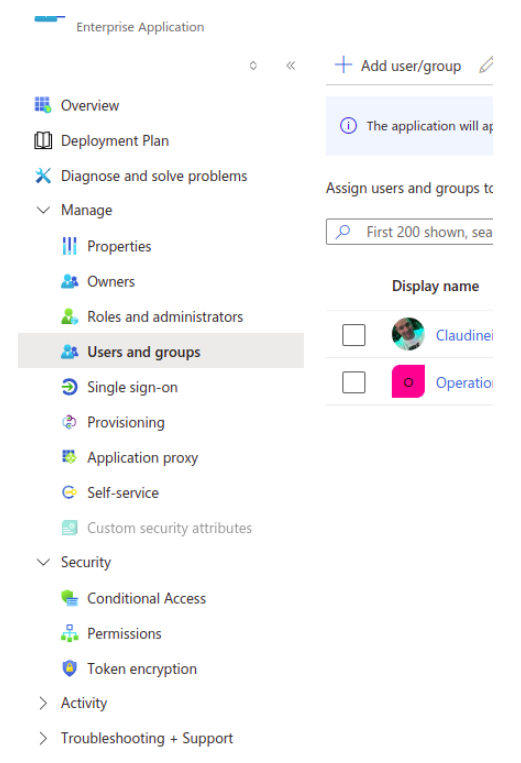
In the Elven Platform, enter the Sign In URL generated in Microsoft Entra. Then, add the users and groups that will have permission to access the Elven Platform through Microsoft Workspace. This ensures that only authorized individuals have access to the application.
Syncing IDs between platforms
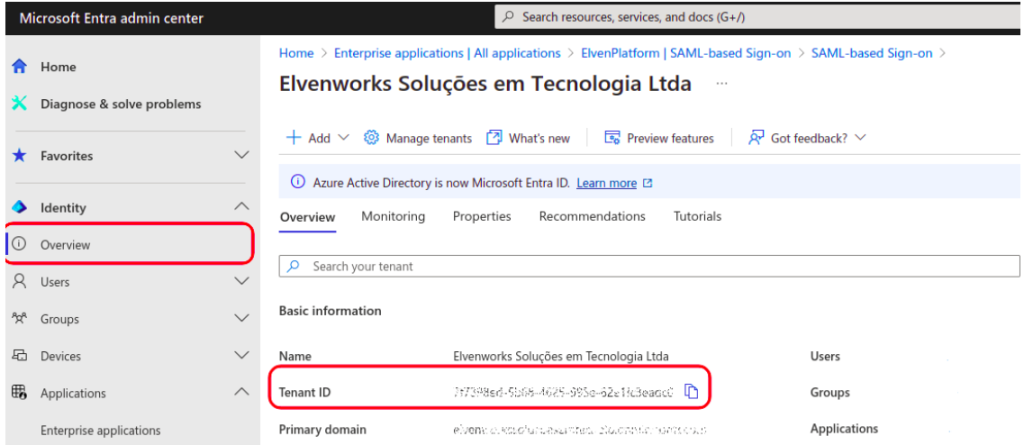
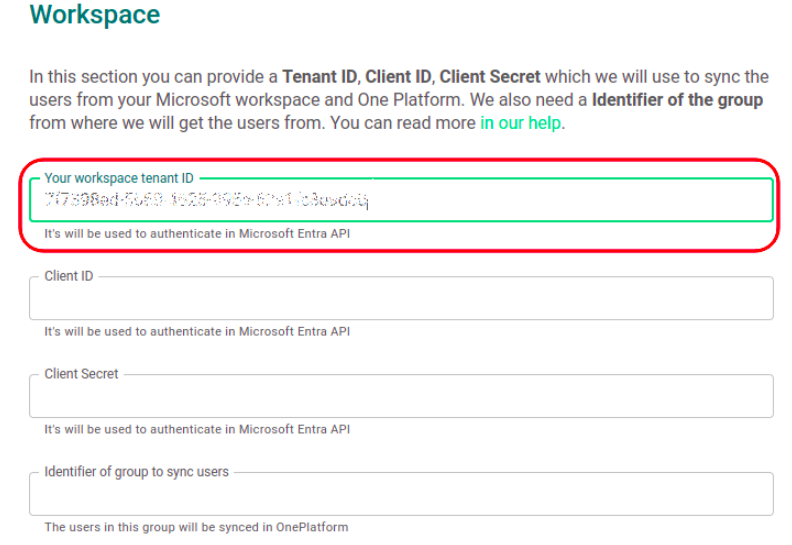
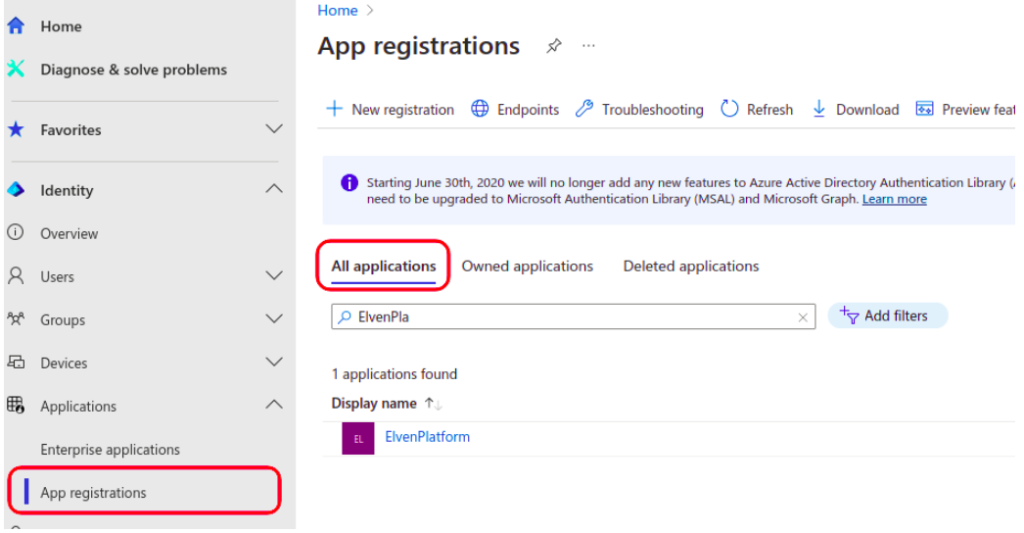
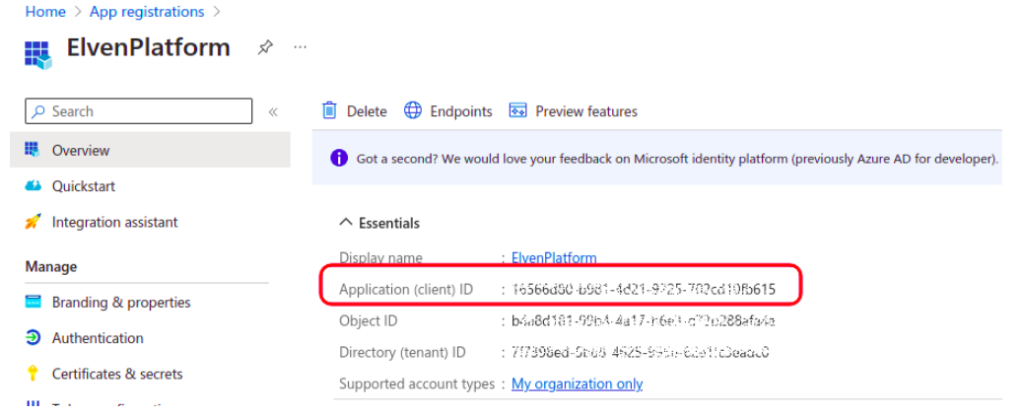
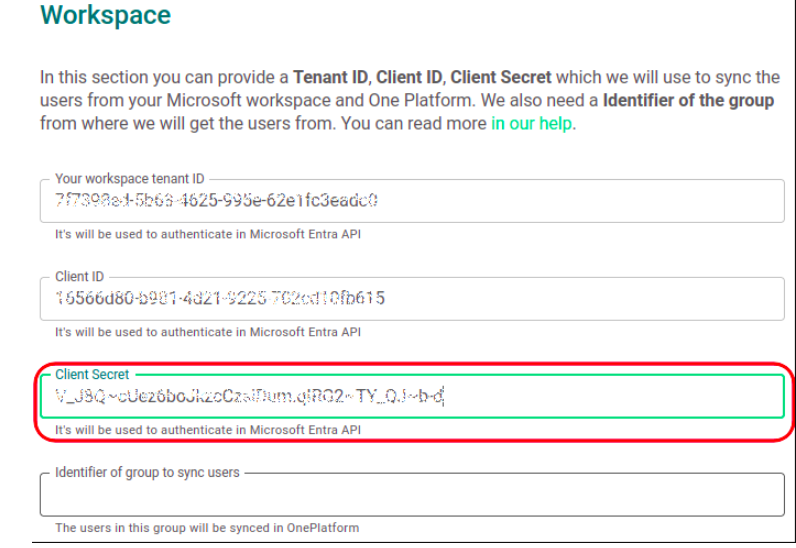
In Microsoft Entra, go to Identity > Overview and copy the Tenant ID. This unique identifier represents the configured workspace and should be pasted into the Your workspace tenant ID field in the Elven Platform. Then, go back to Microsoft Entra under Applications > App registrations > All applications, open your application, and copy the Application (client) ID, pasting it into the Client ID field in the Elven Platform.
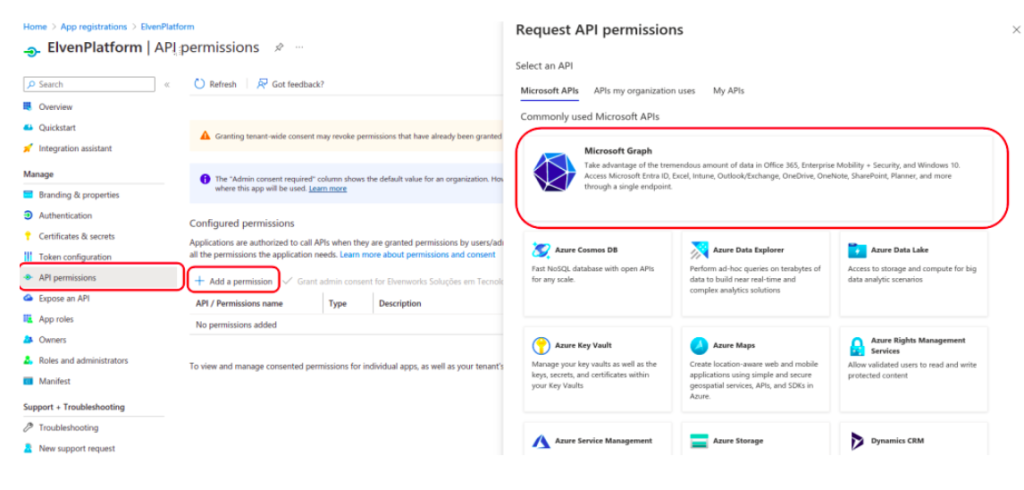
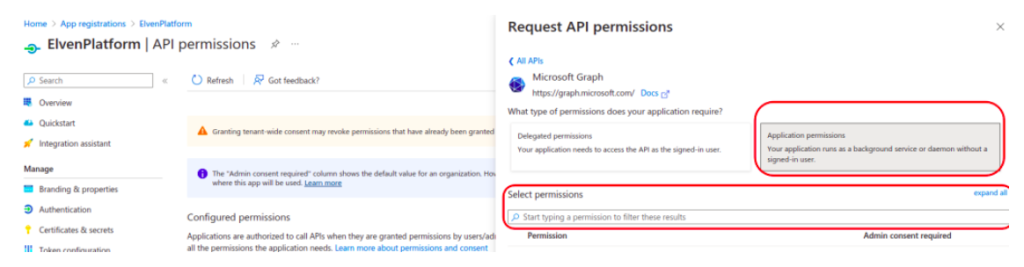
Configuring permissions and client secret
For the integration to work properly, you need to grant permissions to the application. In Microsoft Entra, go to API permissions > Add a permission, choose Microsoft Graph, and add the following permissions: User.Read.All, Group.Read.All, and GroupMember.Read.All. After that, click on Grant admin consent to activate these permissions.

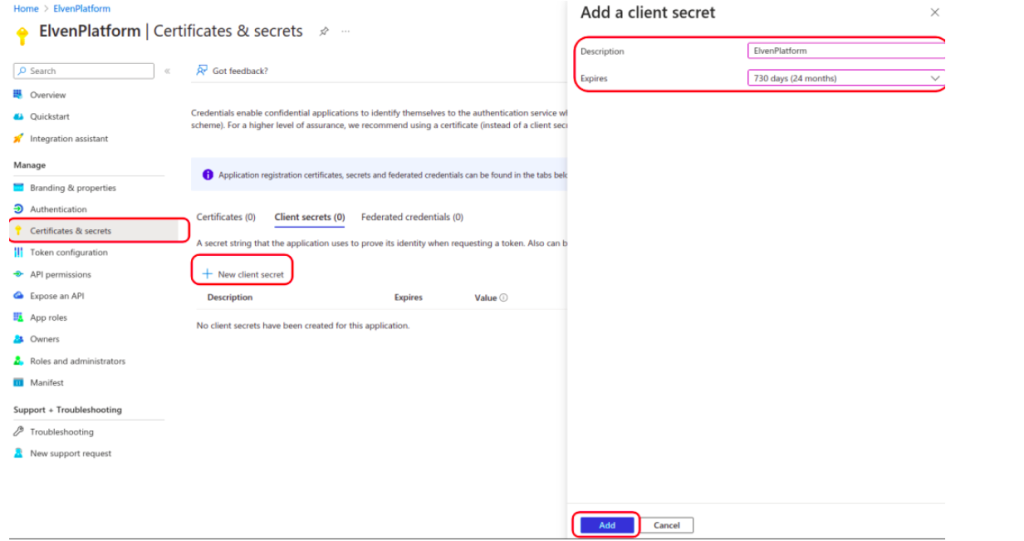
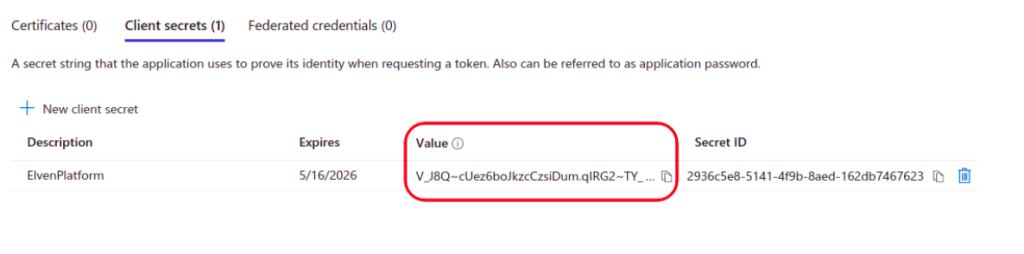
Then, go to Certificates & secrets > New client secret and fill in the fields with a description, such as “ElvenPlatform”, and a validity period of 24 months. Copy the Value generated and paste it into the Client Secret field in the Elven Platform. This secret is crucial for secure authentication between the platforms.
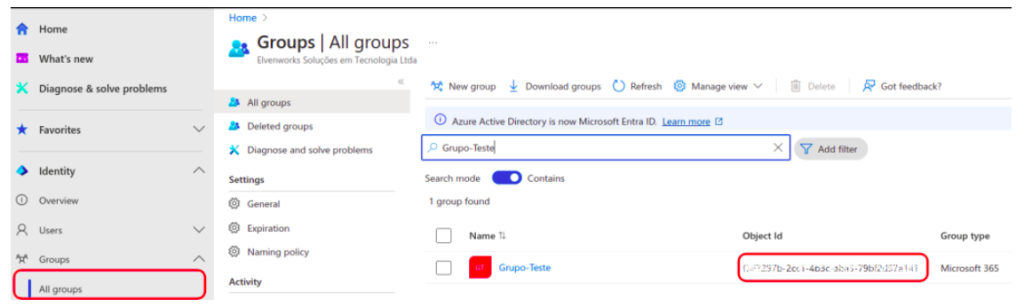
Syncing group users
In Microsoft Entra, go to Groups > All groups and copy the Object ID of the group you want to integrate with the Elven Platform. Paste this ID into the Identifier of group to sync users field and click SAVE INTEGRATION. This will automatically add the users belonging to that group to the Elven Platform with the role “member”. If you need to adjust user permissions, the platform allows you to modify the role later.
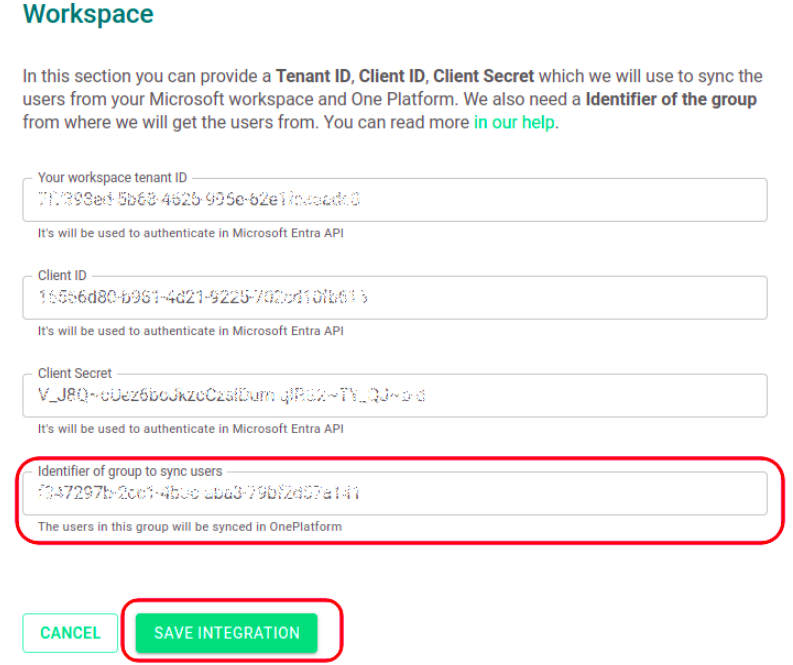
Finalizing the integration
With all steps completed, the synchronization process will be configured. From this point on, users from the defined group in Microsoft Entra will be automatically synchronized in the Elven Platform within an interval of up to 15 minutes, providing fast and secure access.
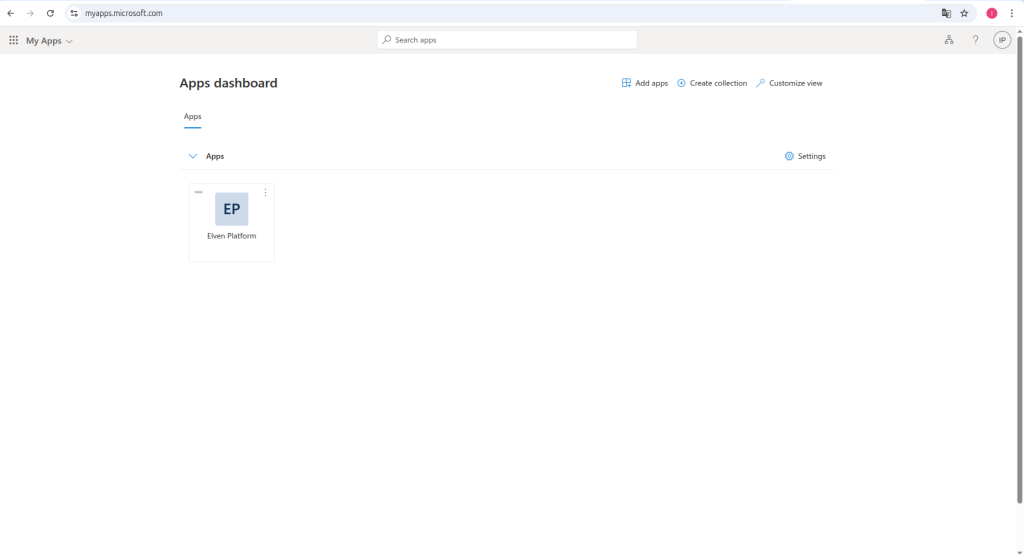
Accessing the Elven Platform via SSO
To access the Elven Platform via SSO using Microsoft Entra, the process is quick and straightforward. Go to the application portal at https://myapps.microsoft.com. After that, you will see a list of available applications. Simply locate the Elven Platform icon and click on it. Access will be granted automatically through Single Sign-On (SSO), ensuring greater security and eliminating the need to repeatedly enter passwords. This journey was designed to be smooth, secure, and frictionless, focused on an efficient and uncomplicated user experience.
Glossary of Technical Terms
SSO (Single Sign-On): Authentication mechanism that allows users to access multiple applications with a single login, eliminating the need to manage multiple credentials.
SAML (Security Assertion Markup Language): Standard protocol for exchanging authentication and authorization information between different systems, facilitating the implementation of SSO.
Microsoft Entra Admin Center: Microsoft platform for managing identities and access in corporate environments, formerly known as Azure Active Directory.
Enterprise Applications: Corporate applications managed in Microsoft Entra, used to integrate third-party solutions with centralized authentication.
Basic SAML Configuration: Section in the SAML setup where technical details are entered to enable integration between systems, such as login URLs and metadata.
PEM Certificate: File format used to store security certificates, ensuring secure authentication between systems.
Tenant ID: Unique identifier of the Microsoft Entra directory representing the configured workspace for the organization.
Client ID (Application ID): Unique identifier of an application registered in Microsoft Entra, used for authentication and integration between platforms.
Client Secret: Secret key generated to authenticate applications when accessing Microsoft Entra APIs and services.
Microsoft Graph: Unified API from Microsoft to access data from various Microsoft 365 services, such as users, groups, and permissions.
API Permissions: Permissions granted to applications to access data and perform operations through Microsoft Graph.
Group Object ID: Unique identifier of a group in Microsoft Entra, used to synchronize members with the Elven Platform.
Elven Platform: Platform that integrates and manages tools for developers and teams, offering features such as centralized authentication with SSO.
Role: Permission level or set of accesses assigned to a user within an application, such as “member” or “admin”.
Sync: Automatic process of updating data between connected systems, ensuring consistency of information.
Workspace: Work environment configured in Microsoft Entra, representing the organization and its integrated resources.
Identity: Central element in access management, representing users, groups, or applications that are authorized.
Last updated
Was this helpful?